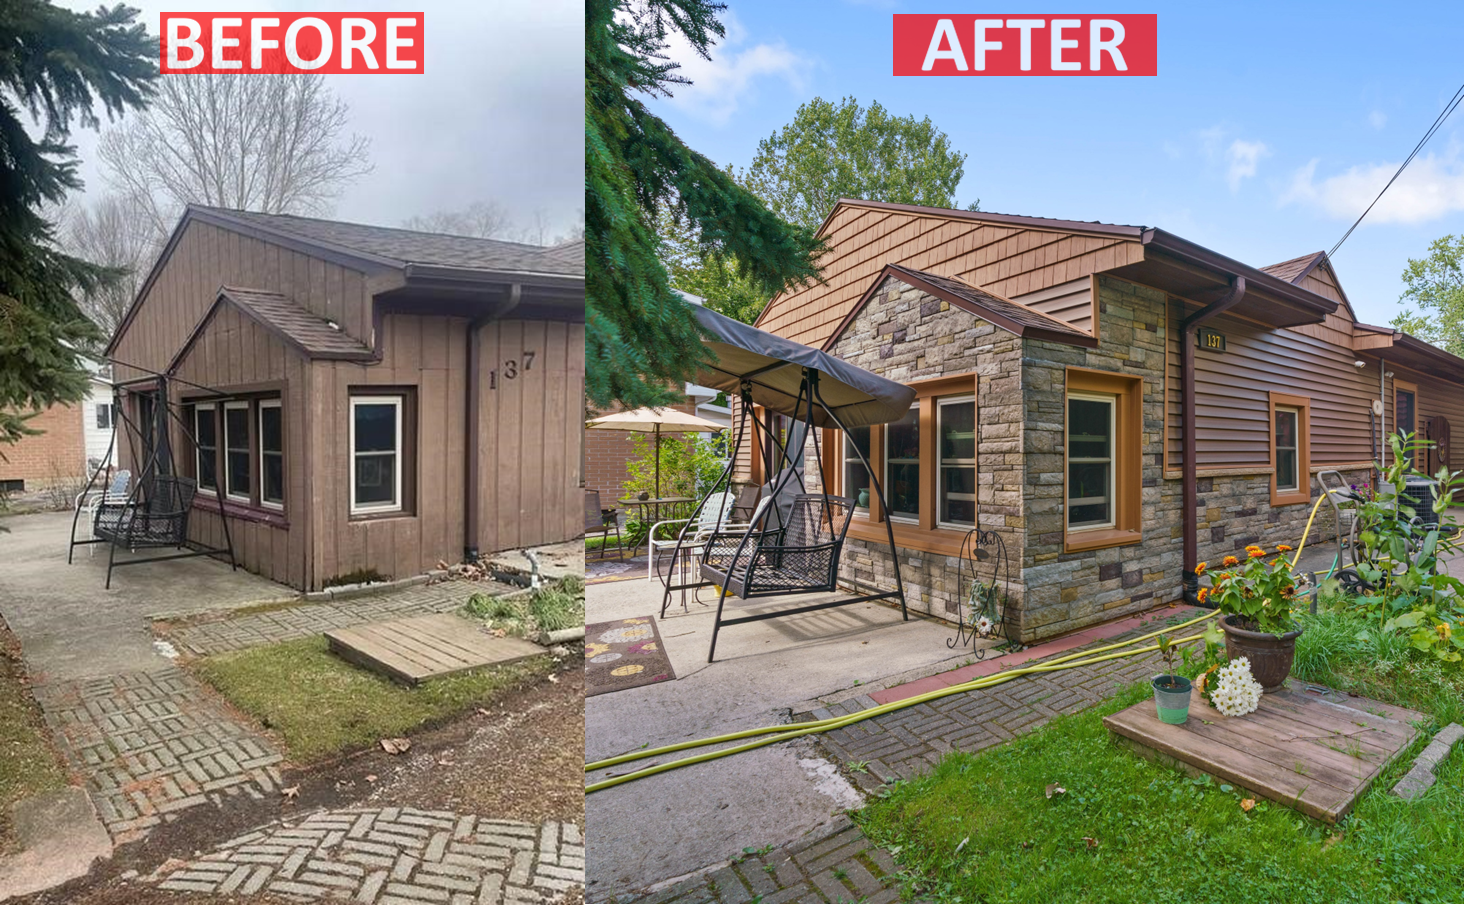
Anyone who has lived through a kitchen remodel knows the story that starts with a seemingly small measuring mistake. The dishwasher door clips the island by half an inch. The new fridge blocks the pantry. The stone tops arrive, and the range sits proud because a wall isn’t plumb. These misses don’t just bruise pride, they cost time and money, and they often leave permanent compromises. Good measuring is the quiet craft behind a kitchen that works. After years of kitchen remodeling, including projects in older Lansing homes with cranky plaster and in newer builds with generous but unforgiving open plans, I’ve learned that “perfect fit” isn’t about perfection. It’s about anticipating reality: walls that wave, floors that dip, appliances that breathe, and people who cook the way they cook.
This guide is a practical walk-through of how a kitchen remodeler develops accurate measurements, how to verify them, and where the traps hide. Whether you are tackling your own kitchen remodel or hiring a Lansing kitchen remodeler, these details help you plan, check, and speak the same language as your installer and fabricator.
Why measuring for kitchens is different
In a bedroom, an inch here or there vanishes behind a dresser. In a kitchen, that inch determines whether your oven opens fully or whether your drawers clear the door casing. Kitchens fold together mechanical systems, appliances with fixed requirements, heavy surfaces, and dozens of clearances. A small error multiplies across components. For example, mis-measure a corner by 3/8 inch, and your blind corner cabinet shifts, the sink is no longer centered on the window, the backsplash seams go off-pattern, and the faucet handle hits the window stool.
On top of that, older homes around Lansing often present rough surprises. Balloon-framed walls with irregular studs. Floors that sag toward a beam by 3/4 inch across a run. A foundation wall that bows just enough to force a scribe. Newer homes can be just as tricky, thanks to drywall build-ups, bullnose corner beads that steal space, or the ubiquity of counter-depth refrigerators that still need door swing clearance. Measuring for a perfect fit means learning the site’s personality before you order a single cabinet.
Tools that earn their keep
A steel tape is the backbone, but it is not enough by itself. I keep a short list of tools that cut down guesswork and rework. Not everything needs to be high-tech, but accuracy and repeatability matter more than brand.
- A 25-foot steel tape with a true hook and clear 1/16-inch graduations. Check it against a known reference from time to time, like a carpenters’ rule or an architectural scale. A 6-foot level and a smaller torpedo level. Add a digital angle finder for tricky walls and a laser level if you can borrow or buy one. A rotary or cross-line laser lets you see level across a room at once, invaluable for cabinet installs. A laser distance measurer for quick overall runs and diagonals. Verify against your tape at least once on site. A framing square and a speed square to test corners and set scribes. Blue painter’s tape, chalk, and a fine-tip marker to label walls, lines, and appliance footprints. A stud finder that can see through plaster and lath if you are working in older Lansing housing stock. A rare earth magnet on a string works when fancy tools don’t.
Bring a notebook, take photos with distances in frame, and sketch with orientation arrows and dates. Measurements without context go stale fast.
Start with the shell: floors, walls, and plumb
Everything you hang or set will inherit the room’s existing conditions. Before you draw a single cabinet box, map the structure and geometry of the room.
Check level across the room. Use a laser or a 6-foot level on a straightedge to find the high point of the floor. Mark it. Every base cabinet height decision starts here. In a typical kitchen, you have 34.5 inches for base cabinet boxes and 1.5 inches for tops for a 36-inch finished height. If your floor falls 3/8 inch across a run, you will either shim cabinets up, scribe toe kicks down, or both. Knowing the high point prevents lifting the whole kitchen to match a random low spot.
Check walls for plumb and plane. Set your level vertically at multiple points on each wall. A wall that leans out 1/4 inch over 8 feet is common in older homes and matters for tall pantry cabinets and refrigerator surrounds. Note any hollow spots or bows in drywall that may require furred out cleats or scribe panels. Tile backsplashes forgive little.
Test corners for square, then confirm with diagonals. A 90-degree corner that reads 89 or 91 degrees changes corner cabinet choices and countertop fits. The tried-and-true method is measure off the corner along each wall the same distance, say 36 inches, then measure across. If it isn’t exactly 50.91 inches, your corner is off. Diagonals across the room tell you how true the shell is overall.
Measure finished surfaces, not framing, unless you control the framing work. If new drywall or flooring will change the room, account for it in your numbers. Quarter-inch drywall, tile thickness, backer board, and flooring all stack up.
Reference lines beat guesswork
Set a finished-floor reference line. If the floor is already finished, this is easy. If you are mid-project, pick a control point that represents finished height and strike a level line around the room at, say, 36 inches from finished floor. This becomes the top-of-counter line, and you measure down to set cabinet heights.
Mark appliance centerlines and utilities. Draw a vertical line where the sink, range, and refrigerator center will land. Check these against windows, lighting, and structure. The plumber and electrician will appreciate a clear target. You will also catch issues early, like a sink that wants to center on a window that isn’t.
Laying out with tape on the floor helps everyone see scale. Mark the island outline in painter’s tape. Step around it. Open a tape measure like a mock dishwasher door. If the taped dishwasher hits the taped island, it will hit the island in reality. This exercise has saved me from ordering an island 3 inches too wide more times than I care to admit.
Measuring windows, doors, and casing that steal space
Trim can chew up inches and stop drawers dead. When measuring, record both rough opening sizes and finished casing widths. Measure from finished face to finished face, not wall to stud. On many projects in kitchen remodeling Lansing MI homes, I’ve seen thick back-banded casing and deep sills on old windows. A faucet handle can clip the stool if you ignore it.
Measure sill height and depth for the sink wall. A standard undermount sink and faucet assembly can require 2 to 3 inches of space behind the bowl. If the window sits low, that space shrinks. Record the height from finished floor to bottom of the sash, bottom of the casing, and depth of the stool. These numbers affect faucet selection, backsplash height, and even whether you need a narrower front-to-back sink.
Door swing steals room. Record the swing direction and radius of any doors that open into the kitchen, including pantry and basement doors. Aim to keep 4 inches minimum between the arc of a door and any cabinet pulls. In tight city kitchens, I’ve swapped a hinged door for a pocket or a barn-style slider to gain that clearance. If you are searching kitchen remodeling near me and interviewing contractors, ask how they handle swing conflicts before demolition begins.
Appliances dictate clearances and services
Modern appliances are fussy. The sheet that comes in the box is not a suggestion. It is a map of how to build around a machine that needs to breathe, vent, drain, and open. Gather every manufacturer spec before you draw cabinets.
Refrigerators are the stealth offenders. A so-called counter-depth unit may still need 1 to 2 inches of rear clearance and extra side clearance for door swing and hinge projection. For a 36-inch unit in an enclosure, I often plan a 37-inch opening with a filler strip, then verify with the model’s hinge diagram. If you want a true built-in look, a lansing kitchen remodeler familiar with panel-ready units can keep you out of trouble, but expect deeper cabinets or a recessed wall.
Ranges and cooktops have landing space and combustible clearances. Standard guidance is 15 inches of landing space on each side of a range and 30 inches minimum clearance to combustibles above, sometimes more depending on local code. Measure hood width relative to the cooking surface. A 36-inch range likes at least a 36-inch hood, and wall caps or roof vents require duct path planning.
Dishwashers need door clearance and a straight drain path. Leave at least 21 inches clear in front of the open dishwasher door. On a peninsula, that often means shrinking the overhang or shifting the dishwasher within the run. Record the location of the sink drain and trap to avoid a crushed hose behind the dishwasher.
Microwaves, wall ovens, and warming drawers vary widely. Depths can run from 21 to 24 inches plus handles. Confirm rough-in dimensions for wall oven cabinets, and mind wall thicknesses on either side. For drawer microwaves, measure the internal clearance behind the face frame to ensure the slide mechanism does not collide with plumbing or electrical.
Ice makers and beverage fridges add vents and drain needs. Plan for toe kick ventilation if required. Floor-level air exchange matters in tight cabinets.
When clients in kitchen remodeling Lansing projects show me a Pinterest photo and say, “Make it look like this,” I answer, “Show me the appliance models.” Without them, cabinetry is a guess.
Sinks, faucets, and the human body
Centering the sink on a window is lovely, but not at the cost of ergonomics. Before you lock it in, match bowl size to cabinet width and faucet projection. Many 33-inch base cabinets take a 30- to 32-inch sink, but apron-front models vary. Measure the sink body and mounting flange yourself if the spec sheet is vague.
Measure faucet reach to ensure water lands near the drain, not at the lip of the bowl. With tall arched spouts popular in today’s kitchen remodeling ideas, aim for 8 to 10 inches of projection depending on bowl size. If you have a thick backsplash or a window stool, check the handle swing. I once had to move a faucet center by 1 inch because the single-lever handle clipped the sash lift by a hair. That inch saved a daily annoyance.
Dish drying and prep habits matter. If you are left-handed and cut over the sink, set the garbage disposal button or air switch to the left. If two people cook, measure aisle widths with both in mind, not just appliance clearances.
Aisles, islands, and the dance of door swings
You can build a kitchen that meets every technical spec and still feels cramped. The feel comes from aisle widths and choreography. I treat 42 inches as a good starting aisle between a run and an island in most kitchens, and I prefer 48 inches where two major appliances face each other. In narrow spaces, 39 inches can work if you choose appliances with shallow handles and manage overhangs.
Islands are magnets for scope creep. Adding a seating overhang, adding a microwave, adding a prep sink, and suddenly the aisle shrinks. Make an honest list of what the island must do, then measure the footprint against the reality of the room. Tape the island on the floor at full size, then stage a mock dinner: open fridge, load dishwasher, pull a pan from a drawer. If anything pinches, shave the island before you fall in love with the bigger sketch.
Peninsulas can be kinder in tight kitchens. They set boundaries for traffic and can deliver seating without doubling back on circulation. The trade-off is fewer approach paths to appliances, which matters in busy households. In many kitchen remodeling Lansing MI homes with galley footprints, a peninsula plus a 12-inch deep hutch opposite is a practical compromise.
Cabinet dimensions, fillers, and why 1 inch of wiggle saves days
Stock, semi-custom, and custom cabinets all follow a logic, but walls do not. I always plan at least 1 inch of filler per run, sometimes more, and I place fillers deliberately near obstacles like a wall that is out of plumb or a casing that needs clear drawer swing.
Measure wall-to-wall in three places at least: floor, 36 inches up, and at the top of cabinet height or ceiling. Record the smallest number. For a run that reads 120 inches at the floor, 119.5 inches at counter height, and 119.75 inches near the ceiling, I plan the cabinet stack to 119.25 with fillers allocated where they hide best. If you push a 120-inch cabinet lineup into a 119.5-inch pinch point, you’ll either trim expensive boxes or lose a day rebuilding.
Tall cabinets need ceiling data. Measure the absolute high and low points of the ceiling along the run. A 96-inch ceiling that dips to 95.5 in one spot can swallow an 8-foot pantry cabinet unless you plan a scribe or a shorter box with a riser. Coffered or dropped ceilings around ducts are common in mid-century Lansing basements, and they wander into kitchens more often than you think.
Take note of outlet and switch positions. When cabinets grow taller or backsplashes run higher than before, electrical devices often land right where a filler or a hood wants to go. Measure and photograph. If you find an outlet centered 17 inches above the existing counter, and you plan a 20-inch backsplash to the bottom of the wall cabinet, that outlet needs to move. Better to discover it in the measuring phase.
Countertops: thickness, overhangs, and seams you do not want to see
Countertops, especially stone and quartz, bring weight and fabrication fixed points. Many clients assume the fabricator will “make it work.” They will, but you can avoid ugly seams or exposed plywood edges by measuring thoughtfully.
Know your slab size and layout. A typical quartz slab is about 120 by 55 inches. Granite varies more. If your L-shaped top requires a leg that is 126 inches, prepare for either a seam or a material change. If waterfall ends are on your wishlist, measure finished floor-to-top exactness and plan continuous grain direction.
Record the thickness of the top and how it interfaces with appliances. A modern slide-in range may want the top surface to sit fractionally above the cooktop edge, while some models ask for the counter to butt the chassis. Verify these details with the appliance spec sheet and tell the fabricator.
Overhangs vary. A standard overhang on a run is about 1 to 1.5 inches. Seating overhangs need 12 inches for stools without knee bangers, and more if you have taller family members. Check leg room against drawer faces and doors. If you intend corbels or metal brackets, measure and mark their positions so they do not collide with drawer slides.
Backsplashes and windows make complex joints. If you have an existing out-of-level window stool, decide whether the countertop edge will scribe to the stool or whether the stool will be reset. On one kitchen remodel near downtown Lansing, we reset a historic oak sill after the stone arrived because the bow was too pronounced. It cost a day, but the straight line against the quartz reads clean every time you stand at the sink.
Venting and the geometry above your head
Hood venting can be straightforward in new construction and maddening in a retrofit. Measure the hood body, the stack, and the path to daylight. Roof rafters and ceiling joists rarely run where you want them. If the duct must offset, record where the elbows will land and how that affects the chase.
Measure the distance from cooking surface to hood filter base carefully. The common range is 24 to 30 inches for electric and 27 to 36 for gas, depending on manufacturer and local code. Too high and capture suffers. Too low and you have a head-bumper. If you plan a decorative wood hood, draft the internal metal liner dimensions and the thickness of the decorative shell so you do not cheat the capture area.
kitchen remodeling lansingIf you intend a recirculating hood, measure cabinet interiors for the filter box and charcoal cartridge access. Sound matters too. If the client complains about noise on the first dinner, it is hard to fix without replacing the blower. Where possible, plan for a remote blower and measure the wiring and control run to match.
Electrical and plumbing rough-ins that prevent gymnastics
Trades appreciate clear targets. As a remodeler, I document and stake out rough-in points with centerline marks and heights from finished floor, not subfloor. If you are acting as your own general, hand your plumber and electrician a page with measurements, and walk the site with them.
For sinks, measure drain height centered on the sink base, usually 16 to 18 inches above finished floor for typical undermounts. Adjust for deep sinks. Keep hot on the left and cold on the right, and clear at least 12 inches side-to-side for the garbage disposal body. For wall-mounted faucets, record rough-in height and the finished wall thickness, including tile and backer.
For dishwashers, place a dedicated electrical outlet within the adjacent cabinet at the back, high enough to clear a pullout if one exists. Mark a 2-inch hole for the drain and supply to pass. If your dishwasher sits to the right of the sink, route the hose uphill as it leaves the machine to prevent backflow.
For ranges and wall ovens, measure the exact location of the outlet or gas stub relative to cabinet edges, not just a wall. You do not want a gas shutoff valve behind a drawer box where you cannot reach it. On induction installations, confirm the breaker size and cable path early. Clipping a base cabinet to fit a junction box is avoidable with a pencil mark a month sooner.
Lighting plays a role in clearance as well. If you plan undercabinet lights, measure the bottom of the cabinet to finished counter distance, and coordinate plugmold or puck light drivers. Tape their positions so the backsplash fabricator avoids drilling outlets where a driver wants to live.
Dealing with out-of-square and out-of-level realities
Every remodeler in kitchen remodeling Lansing has a story about a farmhouse that moved over time. Floors slope toward the original well room. Corners hover between 88 and 92 degrees. You will not straighten the whole house, so you learn to make it look straight.
A trick with backsplashes: split the difference. If the counter is level and the cabinets are level, but the window stool is not, you can feather a tile course to hide a 1/4-inch discrepancy over a span. This requires layout and a tile setter who cares. Measure the slopes and create a tile story before any adhesive is mixed.
For not-so-plumb walls, scribe panels and fillers are your friends. Leave the cabinet boxes square and plumb, and build scribes to close gaps at the wall. Measure wall deviation over the cabinet height. If the wall leans 3/8 inch, plan a 3/4-inch scribe so you are not trimming to a razor.
Toe kicks can disguise floor dips. Set base cabinets off the high point and let the toe kicks grow where the floor falls. Measure the drop and decide how much you will tolerate visually. A 1/2-inch taller toe on one end reads fine. A 1.25-inch swing might be too obvious without transitioning materials or shadows.
Creating a measure-ready site and schedule
Measurements change. Walls get reframed. Drywall adds thickness. Flooring layers add and subtract. To avoid ordering off bad numbers, tie your measurement milestones to construction milestones.
- Measure the shell after framing and mechanical rough-ins, before drywall, to catch utilities that must move. Measure again after drywall is up but before taping mud builds up significantly, to confirm cabinet clearances and appliance rough-ins. Take final confirmation measurements after flooring is installed if floors run under cabinets, or after cabinets are set if flooring will butt to toe kicks. Hand countertop fabricators their own field measure window only after cabinets are securely installed, level, and rigid. Schedule a last checklist visit two to three days before cabinet delivery to verify that walls and floor are ready, and that any site protection is in place.
These checkpoints sound fussy, but they prevent the worst kind of delay: waiting three weeks for a replacement cabinet because a wall closed up 3/8 inch more than you thought.
Documentation that gets read
A clean drawing and a few well-labeled photos move a project forward. Your goal is to make it hard to misunderstand.
Draw plan and elevation views with critical dimensions called out. Mark centerlines for sink, range, and lighting, as well as finished heights. Call out every filler width. Add appliance model numbers next to their openings. Note floor type and thickness, backsplash thickness, and any special edges.
Photograph each wall with a tape measure in frame at key points. Photograph utility stubs with measurements to the nearest corner and floor.
Keep a single source of truth. If you are using a design platform, lock the version that corresponds to ordered cabinets and circulate a PDF to every stakeholder: installer, electrician, plumber, countertop fabricator. If someone makes a field change, mark the PDF and date it.
A Lansing-specific note on older housing stock and climate
In kitchen remodeling Lansing and the surrounding mid-Michigan area, we often contend with seasonal movement. Humidity swings cause small shifts. Wood floors expand and contract. Cabinets that fit tight in August can rub in February. Leave reasonable reveals at end panels and walls. A 1/8-inch reveal looks crisp and allows for a little seasonal breathing.
Basement mechanicals in older homes can force compromises upstairs. Measure chase sizes that will carry new venting or plumbing through. If you anticipate spray foam or added insulation changing wall depths, include that in your cabinet plan. Many older Lansing homes also have radiators or baseboard heat. Measure their footprint and height and plan either cutouts or rerouting. Hiding a radiator behind an end panel sounds smart until you cook through a winter without heat distribution.
When to bring in a pro and what to ask
DIY measurement can work in straightforward spaces. If your project includes built-in refrigeration, custom venting, or walls that vary by more than a quarter inch over six feet, consider hiring a kitchen remodeler to perform a site measure, even if you plan to install yourself. The fee for a measure is small compared to the cost of a misfit pantry or a butchered stone slab.
If you are interviewing firms for kitchen remodeling near me, ask direct measurement questions:
- What is your field measure process and how many times do you verify? How do you handle out-of-plumb walls or floors out of level? Do you require appliance model numbers before ordering, and do you field-verify their dimensions? How do you document fillers and scribes in the plan? Who is responsible for coordinating electrical and plumbing rough-ins against the cabinet plan?
A lansing kitchen remodeler who can answer those cleanly will spare you headaches.
A story of half an inch, and how to avoid it
On a recent kitchen remodel, the plan called for a panel-ready dishwasher between a sink base and a 3-drawer stack. The finish carpenter measured the rough opening at 24 inches and felt confident. The appliance arrived with a spec that stated a required opening of 23.625 inches, but only if the panel thickness was 3/4 inch and the slide brackets weren’t installed. The cabinet door panel was 13/16 inch thick, the brackets were pre-mounted, and the dishwasher refused to slide. We could have shaved the panel in the field. Instead, a pre-planned 1-inch filler next to the drawer stack gave us room to shift and square the opening. The face frame went in untouched. The panel rode proud by a sliver, which we evened out with a hinge adjustment. No drama, no new parts. The difference was a simple rule: never let a critical appliance sit between two immovable cabinet faces without an escape route.
Final checks before you order
Stand in the room with your notebook and the cabinet order sheet. Read each line, then look at the wall or space it represents. Ask yourself what could collide. If the answer is “nothing,” you probably missed something. If the answer is “the crown molding might meet the beam at a point,” you are on the right track. That last mental walkthrough is where experience pays off.
Measure twice has become a cliche in kitchen remodeling, but the lived version is measure, verify, and imagine the install sequence. Tape and lasers are only half the job. The other half is knowing how boxes go in, where hands need room, and how materials behave in real houses over real seasons. A perfect fit is not magic. It is patience, clear notes, a few strategic fillers, and the discipline to check when you are tired and ready to call it good.
If your next step is a kitchen remodel in Lansing, find a partner who cares about these details. Ask to see their measure sheets. Look at their photos with tapes in frame. Trade glossy renderings for practical numbers early. The kitchens that feel inevitable and calm are the ones that started with careful lines on a quiet day, long before the first cabinet showed up at the curb.

Community Construction 2720 Alpha Access St, Lansing, MI 48910 (517) 969-3556 PF37+M4 Lansing, Michigan